[ N o d e M a p S c r e e n s h o t s & T u t o r i a l ][ H o m e ] | [ N o d e M a p M a i n ] | [ E m a i l ] |
|
|
|
To demonstrate the capabilities of NodeMap, I thought I would take something
relatively simple, such as the design of this website! (don't be surprised if
the actual structure of the site turns out to be totally different to this...)
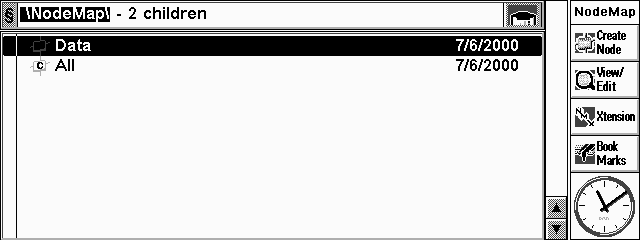
This is the initial screen after the creation of a new NodeMap.... |
|
|
Let's start by creating a website design context which will show all of the
nodes used in this project regardless of what hierarchy we create. Either tap
the Create node toolbar button or press the spacebar to create a new node.
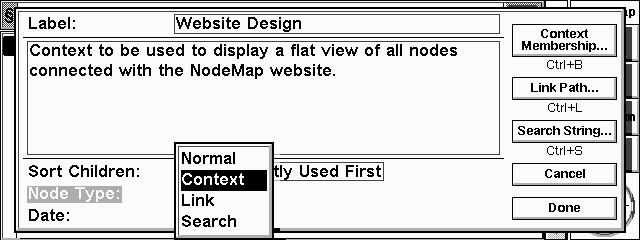
You will be presented with the Node edit dialog.
Type in a Label (title for the node) and a description if you like. Then use the Node Type choice box to make this node a context. Press the Done button when you've finished. |
|
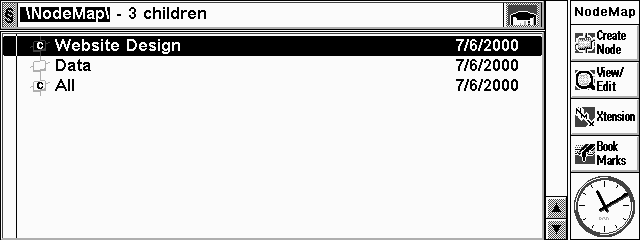
| You will now be returned to the main screen where you can see the new node. Note that the icon contains a "c" to denote a context. |
|
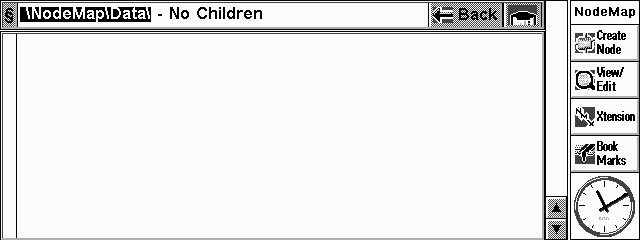
| Now tap twice on the Data node, or highlight it and press the arrow-right key. You are now viewing the children (or lack thereof) of the Data node. Note also that the Current Path window at the top of the screen changes to reflect the new position in the hierarchy, and now contains a Back button to return you to the parent of the current node. |
|
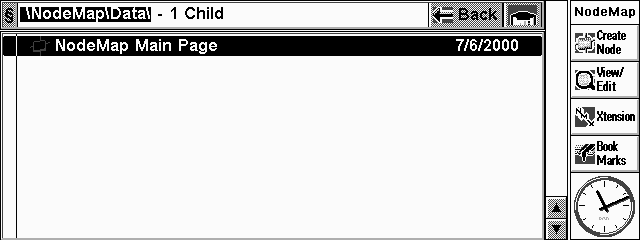
| Now we can create a node here called NodeMap Main Page... |
|
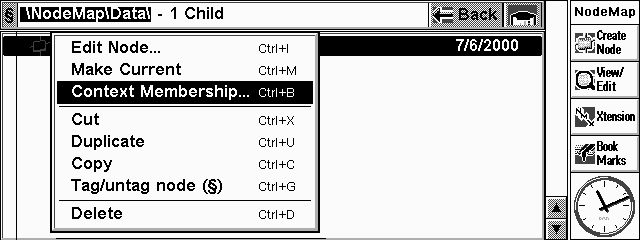
| ...and we want to make sure that it is a member of the Website Design context that we created earlier. There is a menu option for Context Membership, and you can also do the same thing through the Edit Node dialog, but I wanted to show something else off first :-). If you tap on the node's icon, you will get a menu.... |
|
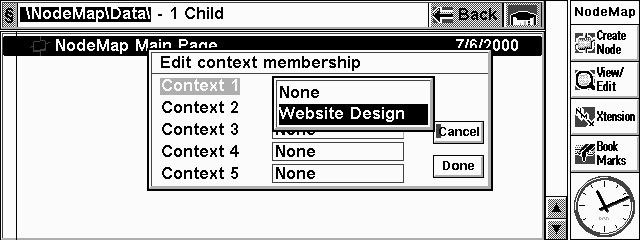
| Select Context Membership and you will be presented with this dialog. Each node can belong to up to 5 contexts, although of course we only have one defined at the moment! Select Website Design from the available options. Any children that we now attach to this node will inherit its contexts. |
|
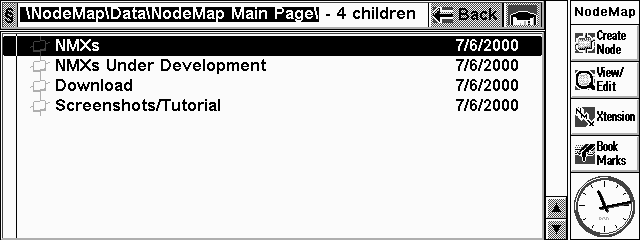
| We can now create children under this node which represent, in this case, the pages to which the main page links. |
|
|
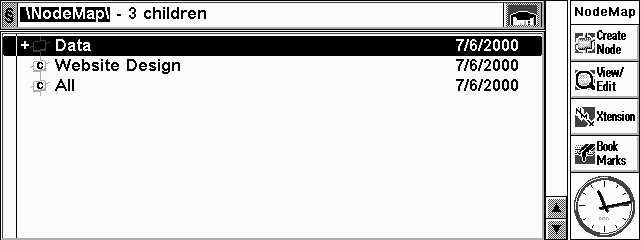
If we now return to the root node of the NodeMap, we can see that the Data node
now has a + to the left, to show that it has children.
Now tap twice on the Website Design context to view its members... |
|
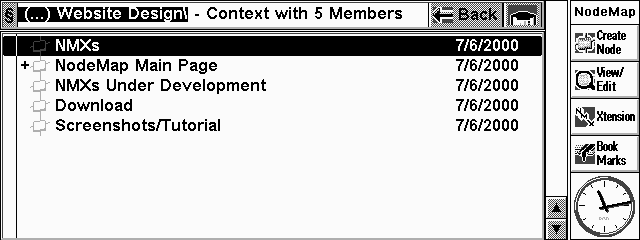
| As you can see, all five nodes that we've created are listed here. Although the NodeMap Main Page node shows a + sign, we cannot make it current; its children are, of course, the other four nodes visible in this view. |
|
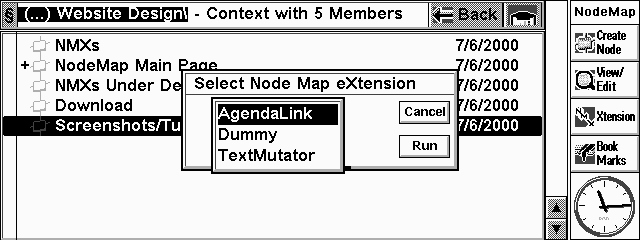
| Now, to demonstrate some of NodeMap's other functionality, let's assume that there's a specific deadline for getting the Screenshots/Tutorial page sorted, and we want to be reminded that it needs doing. We can use the AgendaLink NMX to automatically create an Agenda entry for this node. Tap the Xtensions button on the toolbar to bring up the list of installed extensions... |
|
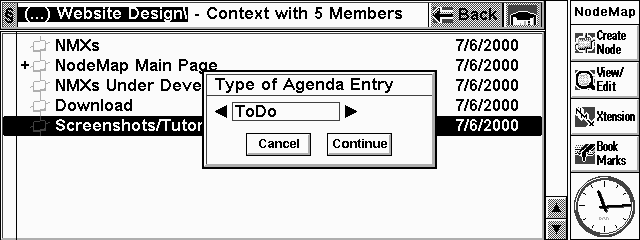
| Once we have selected "AgendaLink" and tapped Run, we can tell it to create us a todo entry in the Agenda... |
|
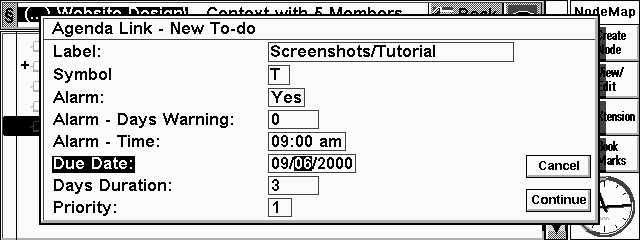
| ...and we can set the relevant details for the entry. The default date is derived from the node's create date, but can be changed. |
|
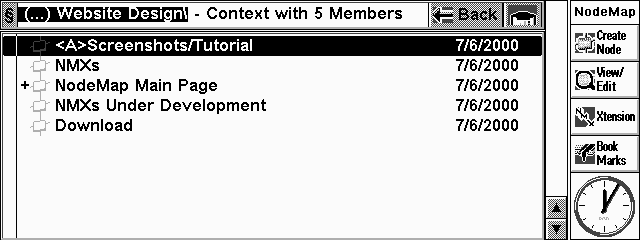
| And that's the link created! Note that the node's label has been prefixed with [A] to show that an AgendaLink exists for it. |
|
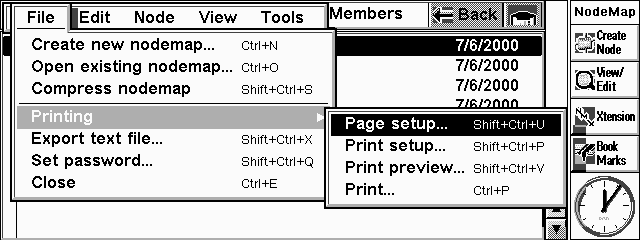
| There are, of course, many other functions and operations not covered here. NodeMap supports printing, exporting to text, password protection.... |
|
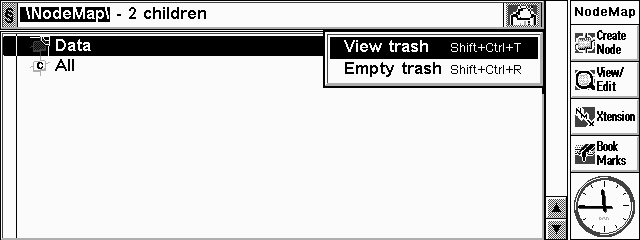
| Also worth mentioning is the Trash node, which functions a little like the Win95 recycle bin. Here we have deleted our context and the nodes beneath the Data node. Notice how the Trash icon on the right of the Current Path window has changed to show a node sitting in the trash. If you tap on the button, you have the option to either View the trash like any other node, and cut and paste its contents back into the main data hierarchy, or Empty it to permanently delete its contents. |
|
| Hopefully this has demonstrated some of the features of NodeMap. If you wish to download it and try it out, click here. |
(c)2000 Dave Eggleston.[ H o m e ] | [ N o d e M a p M a i n ] | [ E m a i l ] |
